Buying Overview
Zenfolio's process for purchasing consists of the following basic steps:
Step 1: Select the photo(s) for purchasing/downloading
Step 2: If relevant, choose the Product Category (this step is skipped if the products fall into 1 category)
Step 3: Choose the product(s) to purchase: add to shopping cart
Step 4: Adjustments & personalization
There's also a video tutorial here if you prefer less reading!
Step 1: Select the photo to Purchase/download
We're going to do a simple, one-at-a-time process here (in the gallery thumbnail view you can select & buy multiple pictures).
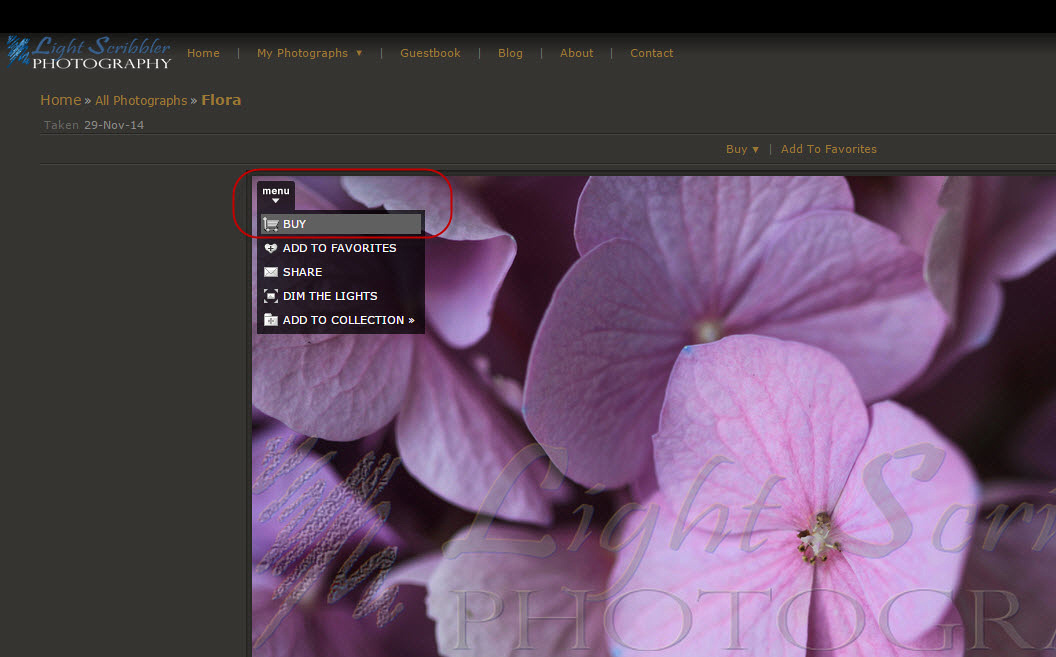
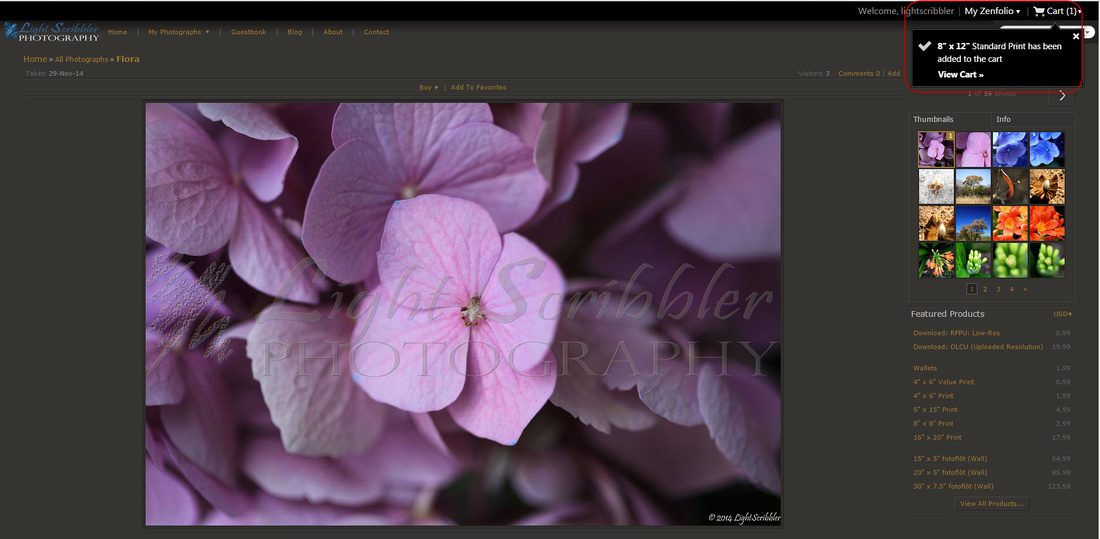
While viewing a photo (repeat clicking on the thumbnails until you get to the photo itself):
1. move your cursor over the top left hand picture corner to activate the menu
2. select the “Menu> BUY” item, as shown below.

Step 2: Choose the Category…
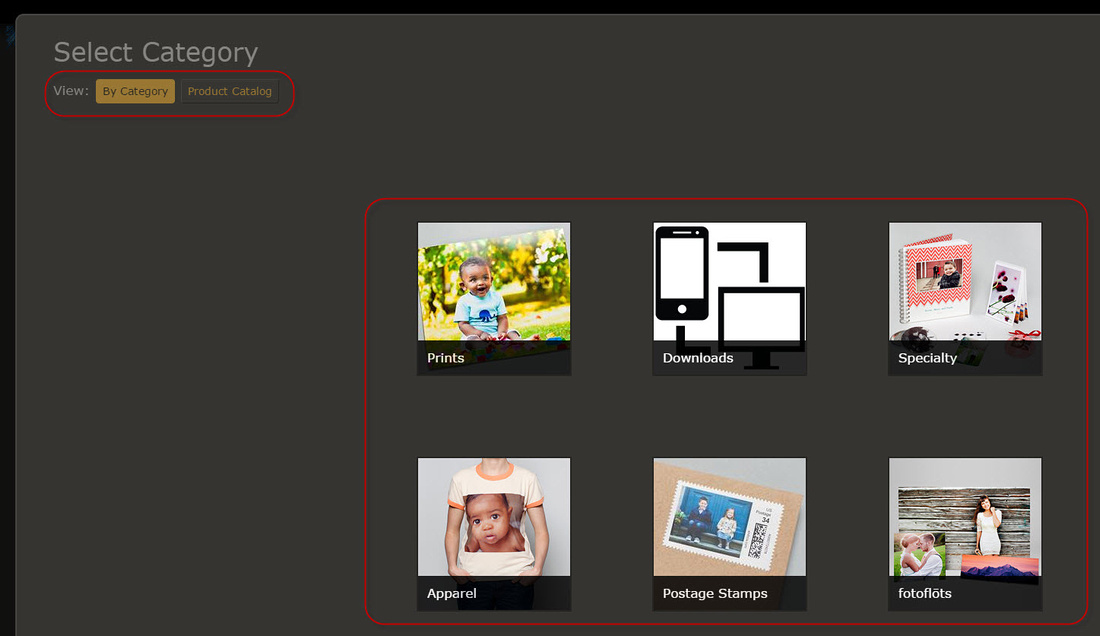
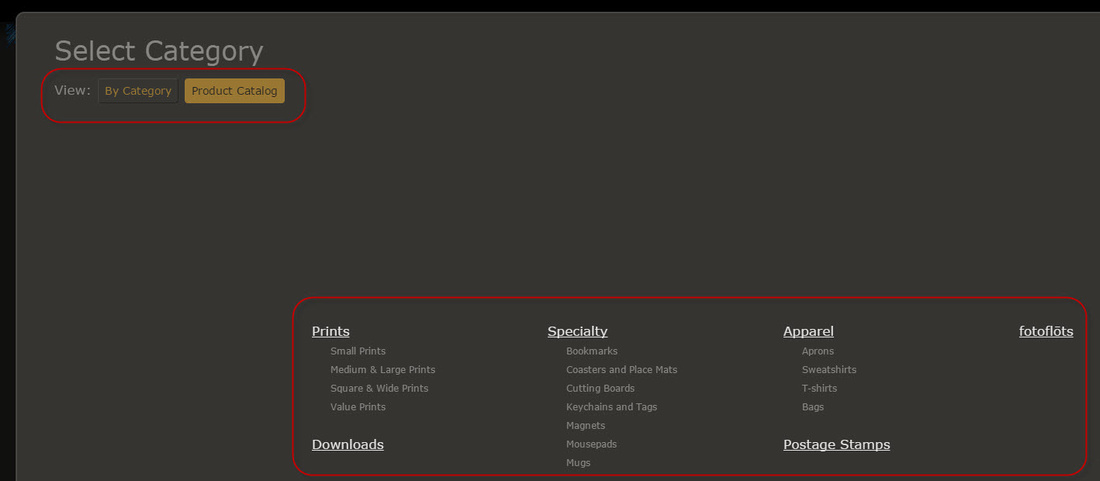
The categories are displayed either as icons or as a text listing, depending on the displayed view (“By Category”, “Product Catalogue” - I personally prefer the icon view):
Display “By Category” View:
Display “Product Catalogue” View:
The categories offered depends on the original photograph characteristics (size & quality) and the products customized for it. In this example, we have:
Prints
|
Downloads
|
Specialty
|
Apparel
|
Postage Stamps |
Fotoflots(“Photo-floats” - Wall Mounts) |
Step 3: Select the product
1. Prints are broken down into sub-categories, Like “Small Prints” & “Medium & Large Prints”
2. Scroll through the various products in your chosen category and single-click the product to expand the buying options (Paper Type, qty)
3. Once you’ve chosen your paper type & quantity, click [Add to Cart].
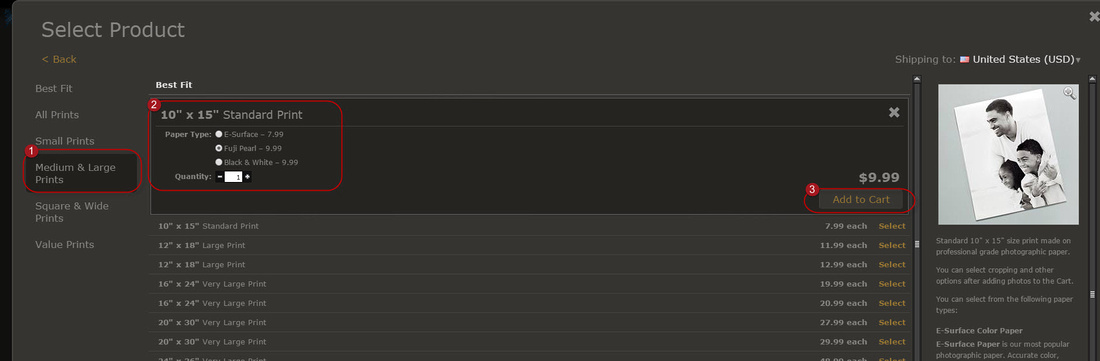
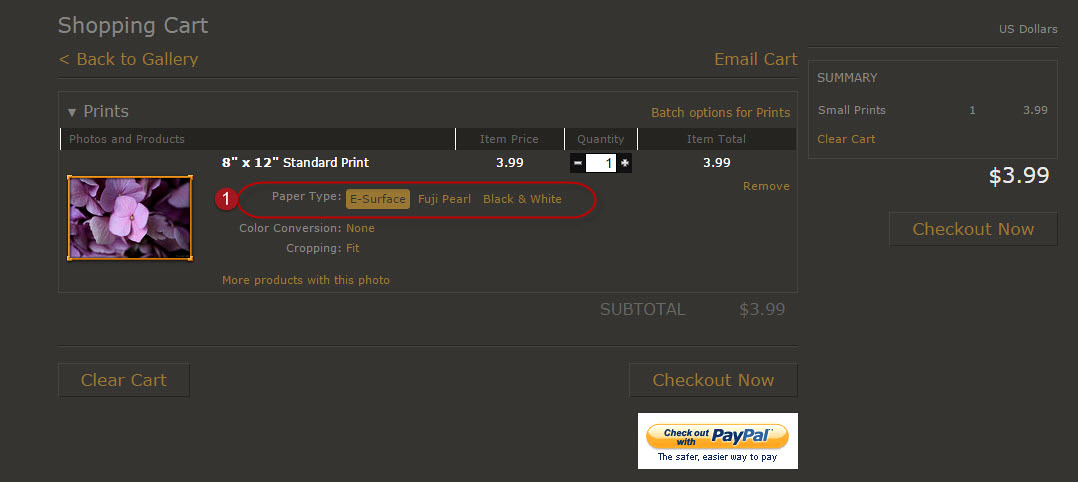
Note: The different paper types are described on the right-hand-side of the screen.

Clicking [Add to Cart] returns you to the picture view with a confirmation that the item was added to your cart.
Step 4: Adjustments & Personalization
The screen below is the final checkout screen, BUT, there are a few adjustment options you may want to consider before checkout!
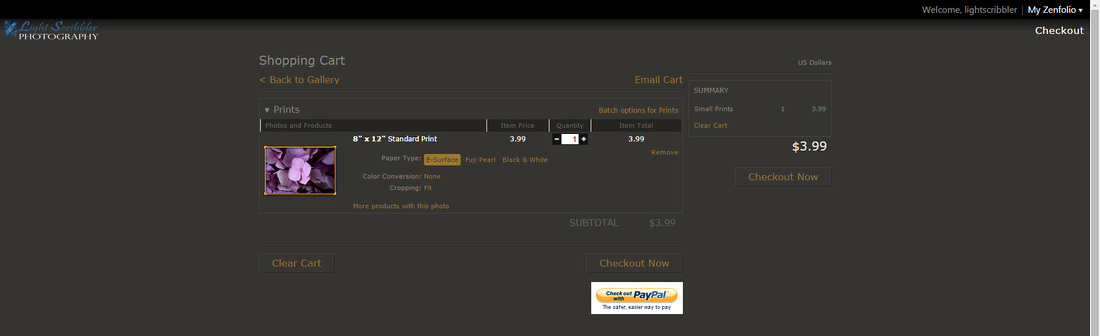
Adjustment options are:
Option 1: Change the Paper Type
You can do a last-minute change on paper type - note that selecting “Black & White” changes the picture to a black & white photo automatically, using Zenfolio’s standard conversion.
If you’d like a custom B&W conversion, please contact me.
Option 2: Color Correction
- Color correction (if available) is applied by the vendor, before printing.
- There is no visible change to the picture on screen if you select this option - the adjustments are performed by the vendor, per the setting this flag.
- Not all Zenfolio vendors offer color correction (softproofing)
- I am running my own tests and examples to see whether I can recommend one approach over the other.
- In most cases, I have NOT assigned ‘print’ products to pictures that I could not myself successfully softproof; so if only downloads are offered, then softproofing did not render printable results
- To be safe, set Color Correction to ON - your satisfaction is guaranteed.
Option 3: Color Conversion
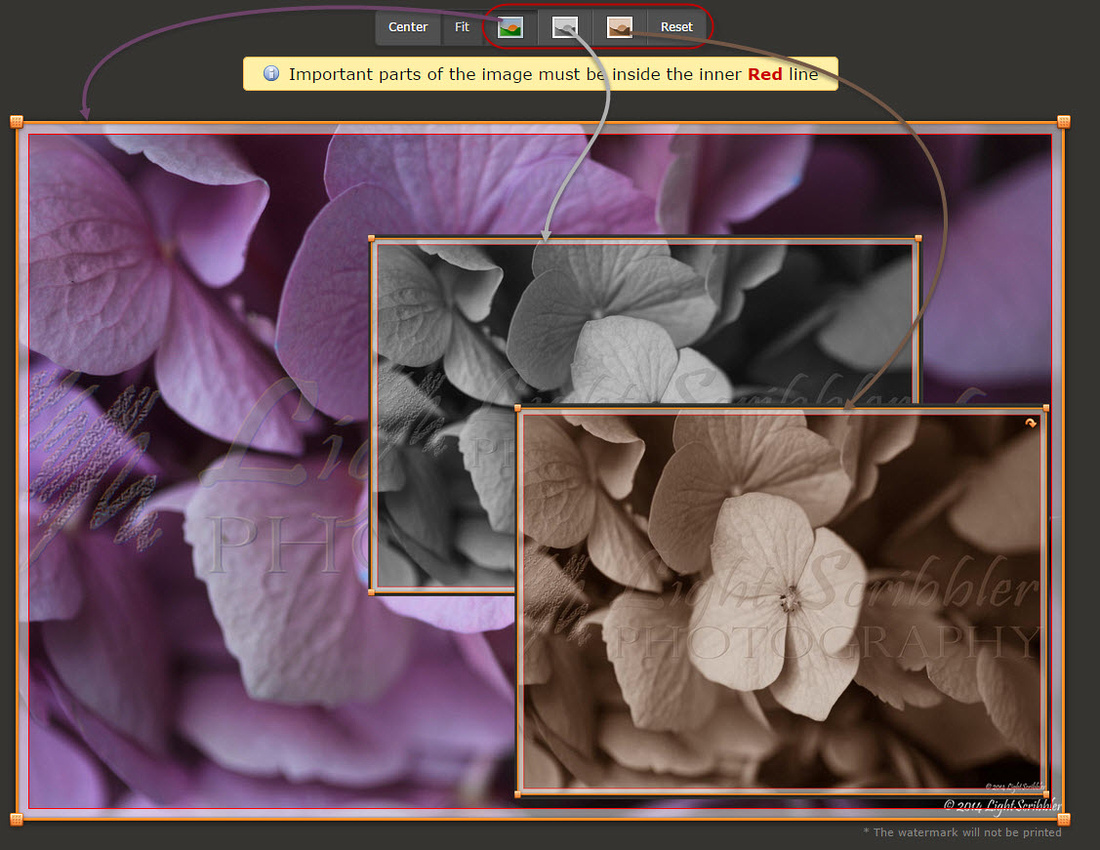
Clicking “Color Conversion” takes you into - what I call - the “Final Adjustment” screen, shown below:
The 3 color conversions available are:
1.
![]() Original Color
Original Color
2.
![]() Black & White
Black & White
3.
![]() Sepia Tone
Sepia Tone
Clicking “Reset” will return the photo to its original Color settings.
Option 4: Cropping
Here’s a really nice feature to allow further customization of your photo to suit your individual taste!
Clicking “Cropping” takes you back into the same “Final Adjustment” screen, shown below:
-
You can crop (change the picture dimensions) by moving (click + drag) the orange handles
 at the corners of the photo.
 - You also have the “Center” and “Fit” buttons to automatically adjust your photo to the print paper size you’ve selected.
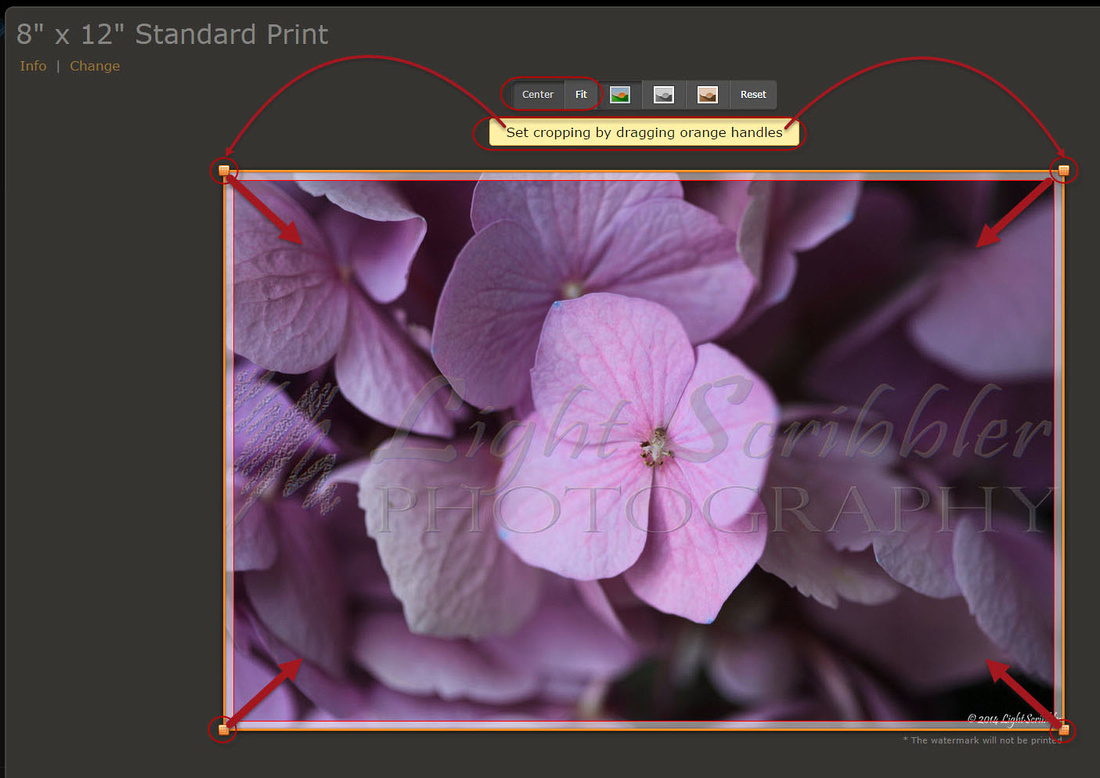
Cropping maintains the dimensions of the size paper, so you cannot adjust length or width independently.

Moving your cursor anywhere over the image activates the automatic ‘rotate’ button.
When clicked, will automatically rotate the print area border 90 degrees & size the cropping according to the paper dimensions.
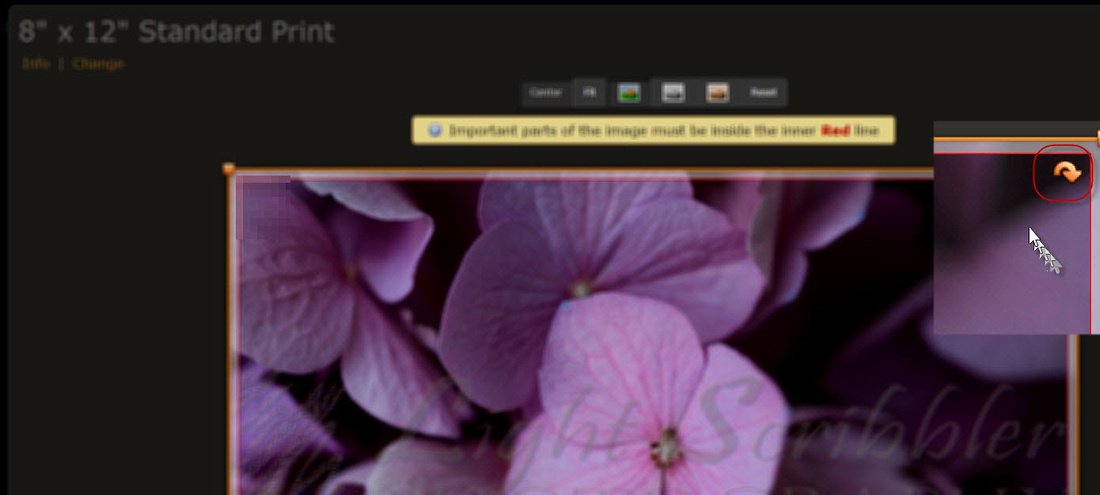
Note the warning that Important parts of the image must be inside the inner Red line of the print area border.
- Further adjustment/sizing may be necessary to eliminate any white area that is out of bounds of the image selection.
- Clicking the Rotate icon again, revolves the selection 90 degrees automatically, again, according to the print size.
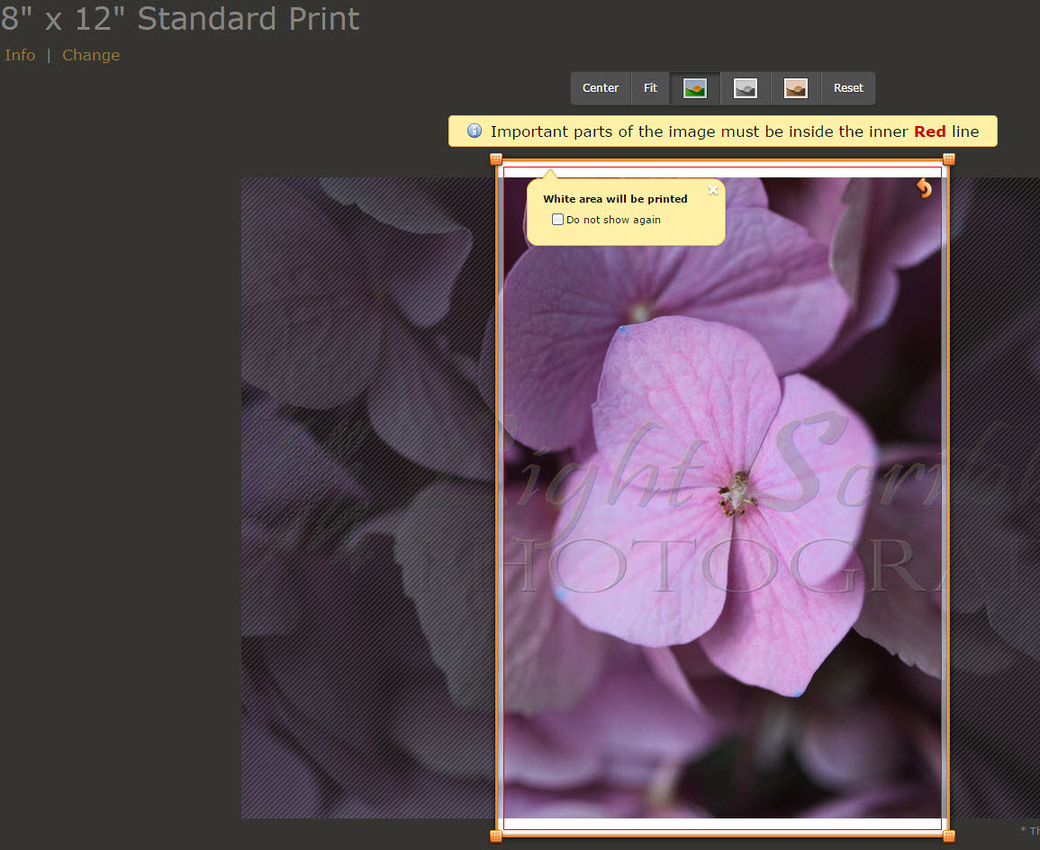
In this selection example, the printable area is 100% within the bounds of the image selection, so no warning is given that white area will be printed.
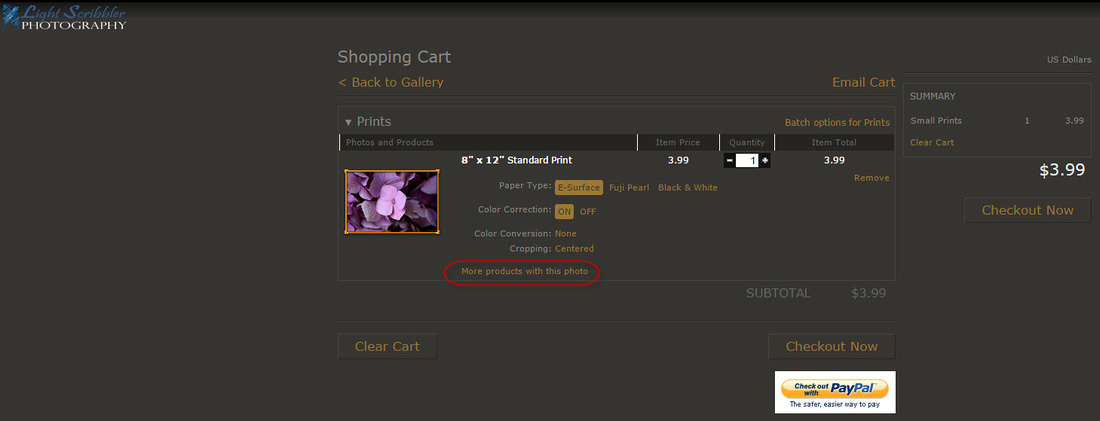
Option 5: More Products with this photo
Here you can add additional products to your cart for the same photo.
Examples:
- you’d like a duplicate print in black & white or Sepia, or
- additional prints in different sizes.
Video: Purchasing Prints from a gallery
Here is Zenfolio's video tutorial on how to purchase prints from a Gallery: